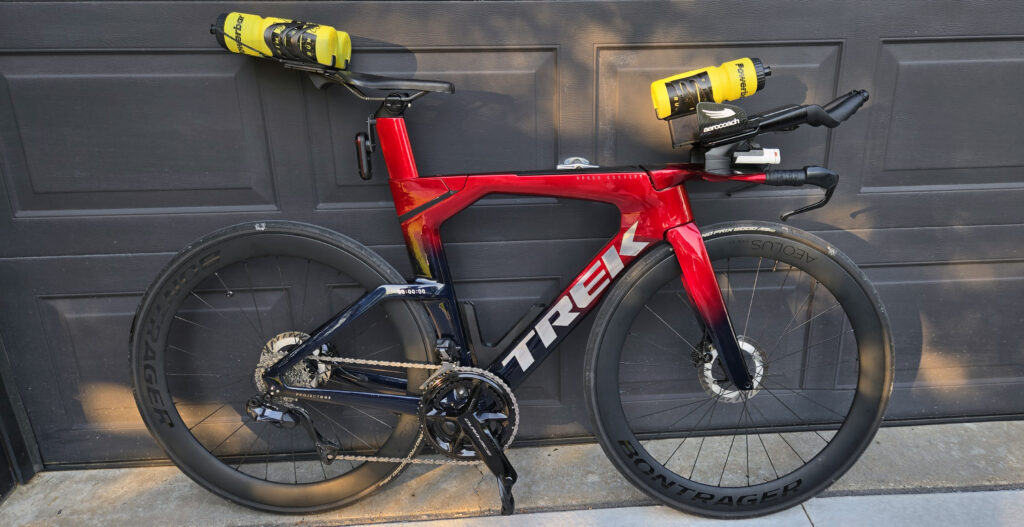
Wove Dual Bottles Side-by-Side BTS hydration Setup
Updated 2026-08-26
Product Info: https://triguertin.com/tg_wove_2bts/
PDF Version of this document: https://triguertin.com/wbtsi/ (Check your browser’s DOWNLOADs)
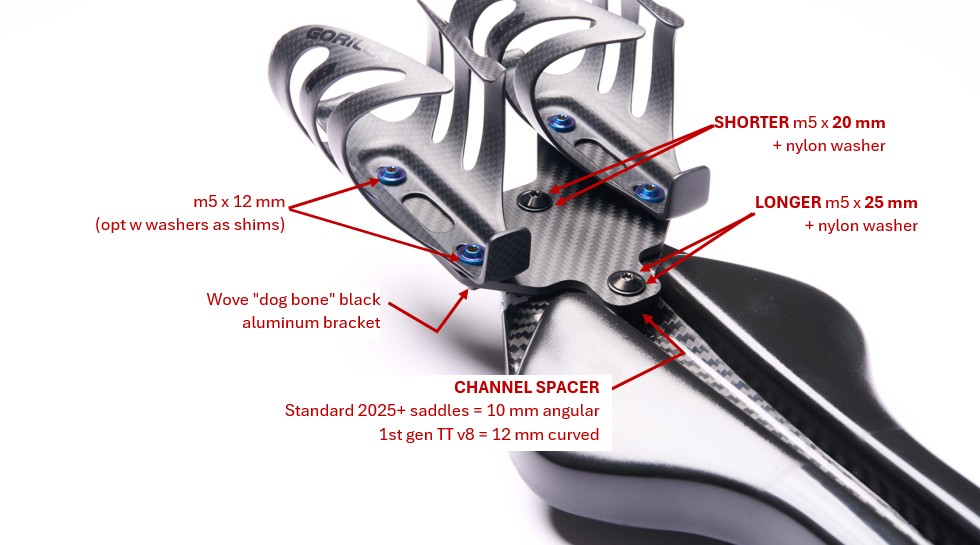
Saddle Compatibility:
- Wove TT V8 v1 (2023-2025)
- Wove TT V8 v2 (2025+) & Wove M8
- METAL rails version of TT V8 & Wove M8 – Needs TPU Shim -> see Appendix 1
Important Notes:
- METAL rails version of TT V8 & Wove M8 – Needs TPU Shim -> see Appendix 1
- Thread Locker: mandatory to prevent the screws from coming loose with road vibrations.
(This is a valid recommendation for any BTA/BTS setup.)
Use non-permanent (medium strength) thread locker compound (like “blue Loctite 242“, Permatex Blue, etc). You can find it at local hardware stores (or Amazon).

- Do not overtighten the CF plate screws – Max Torque 2.2 N.m. Use thread locker to keep things in place and tight.
Guidance for the plate screws: Work both screws in in alternate fashion. Then tighten the back screw first, then the front one. When you feel it starts tightening (noticeable increase in resistance), add 1/2 to 3/4 turns (approx. 2.0-2.2 N.m) - Foam and spacer might initially compress and settle , which might release tension on the screws;
-> Check how secure the CF plate is holding after 1h and/or before your first ride. Tighten a bit more if needed. After that it will be stable, but still recommended to check your screws tightness before a race or event. - My recommendation is to run 2x750ml bottles (or smaller) just to limit the hanging weight and potential for issues over time with repeated vibrations. This is what I tested the system with over several months of riding.
That being said, seems like a fair amount of people seem to ride with 950 ml bottles without issues.
Kit Components
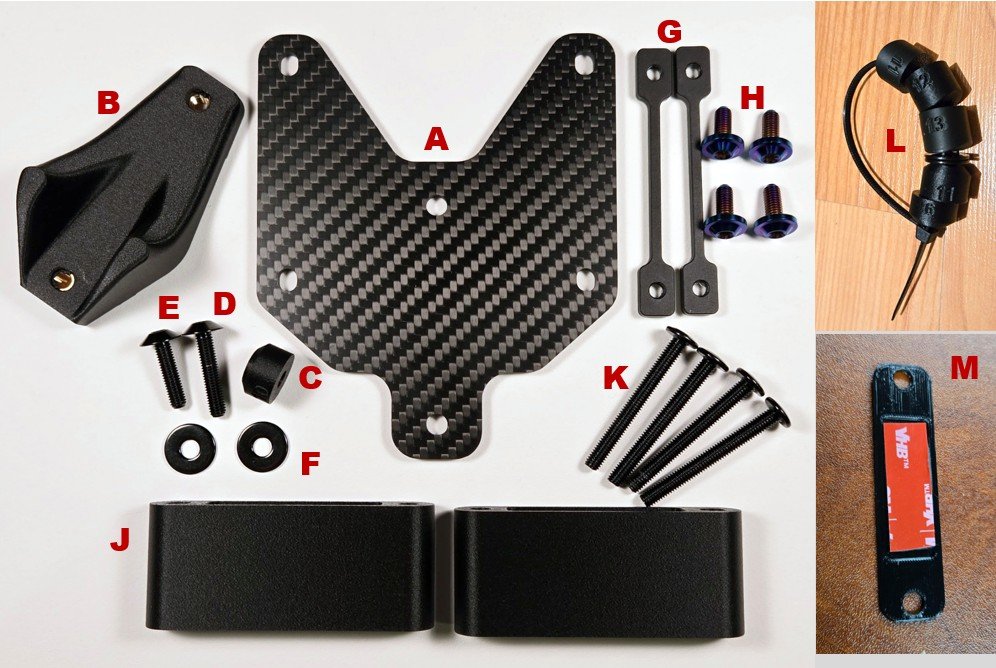
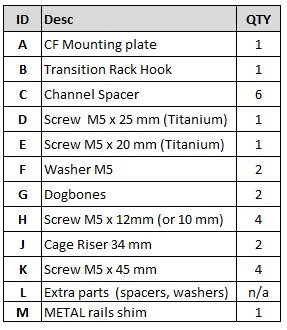
Channels Spacers
First, ensure to select the correct channel spacer. The kit comes ready to use the default 10mm angular spacer.
Use default 10 mm angular spacer for current generation (2025+) saddles.
Use 12 mm rounded spacer for early TT v8 v1 saddles (2023-2025). It is in the extra parts on the zip tie ring.
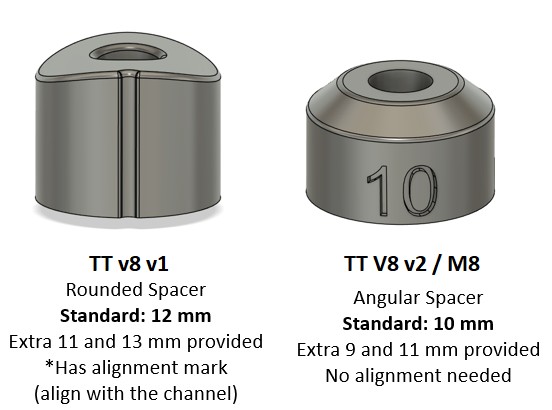
Notes:
– Spacers above are shown upside down; the flat end interfaces with the CF plate. The shaped end with the channel.
– See Appendix 2 for channel spacer thickness selection if the default one does not seem to secure the plate firmly.
Installation
The foam side of the CF plate must interface (contact) with the Wove saddle’s tail (foam side down).
Optional tip: On my own saddles, I applied 3M clear paint protection film on the saddle tail the prior day to protect the finish on it. I already had some and I like keeping my things in pristine shape.
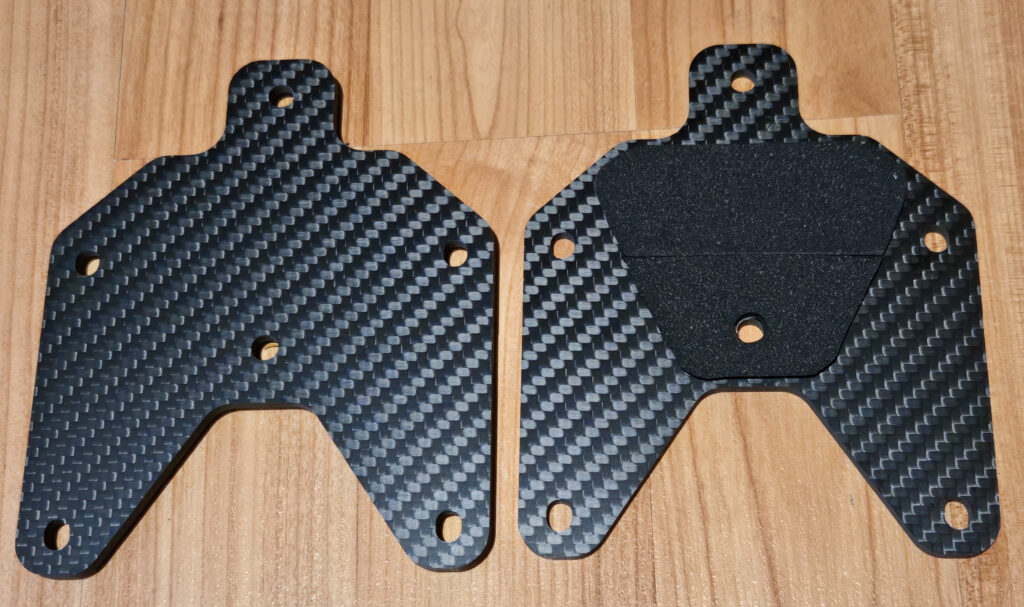
Use a T25 Torx tool to mount the plate and secure it as described below;
Don’t forget to apply thread locker.

Rear of saddle:
Use the shorter M5x20mm screw through a washer and the CF plate.
Middle Saddle hole
Use the longer m5x25 mm screw through a washer, the mounting plate and the channel spacer (rounded/angular side down!) before going through the hole in the saddle channel.
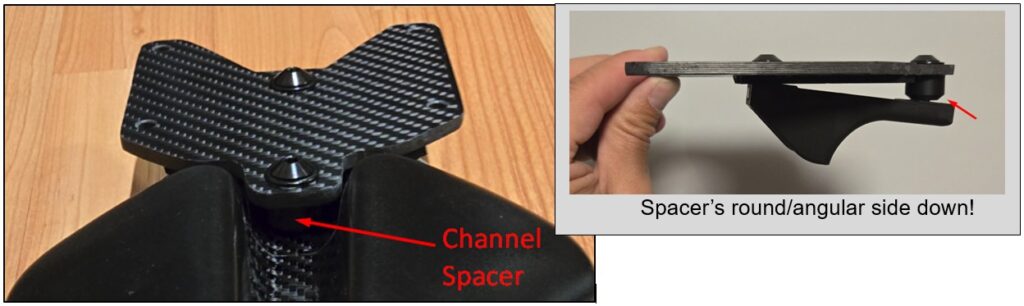
Thread both screws into the “transition hook” under the saddle.
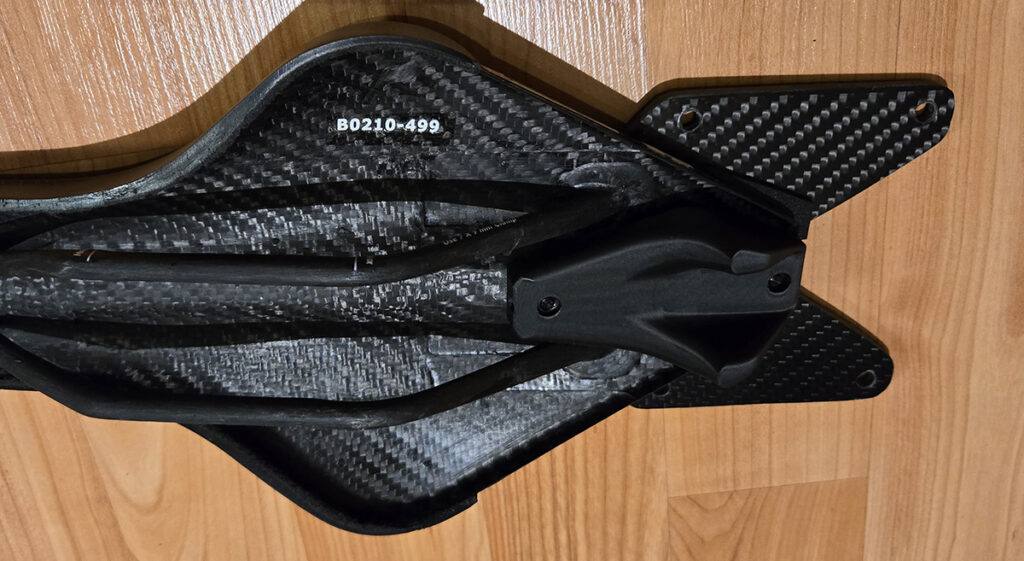
Tighten (reasonably, not too tight) the 2 plate mounting screws.
Guidance for the plate screws: Tighten the back screw first, then the front one. When you feel it starts tightening (sudden increase in resistance), add 1/2 to 3/4 turns (approx. 2.0 N.m)
Try to wiggle the plate left and right. It should be held solidly in place. If not, tighten the screws further.
Important: as mentioned, the initial assembly might settle a bit. After 1h and before the first 1-2 ride(s), try to wiggle the plate. Tighten the screws further if needed. Once settled, it will be good going forward.
Bottle cages
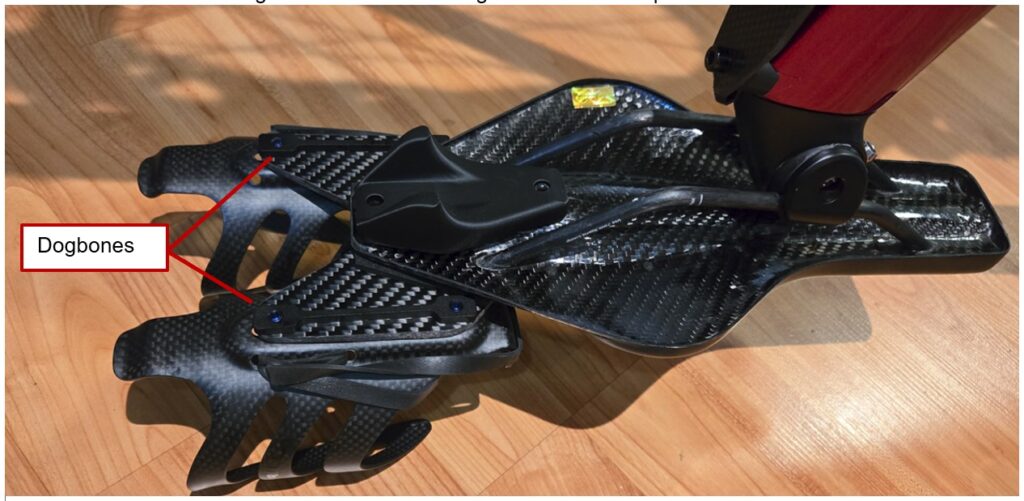
Bottle cages can be installed using the provided Wove metal dog bones under the mounting plate.
Optional – Cage Risers
If It is desired to have the cages mounted higher up (for convenience, ease of reach or purely for aerodynamic reasons), 34 mm cage risers are available.
Cages must then be secured using M5 x 45 mm screws going through the risers. Please use thread locker.
Again, the spacer might “settle” after some time, please check and re-tight after some time or after the first ride(s).
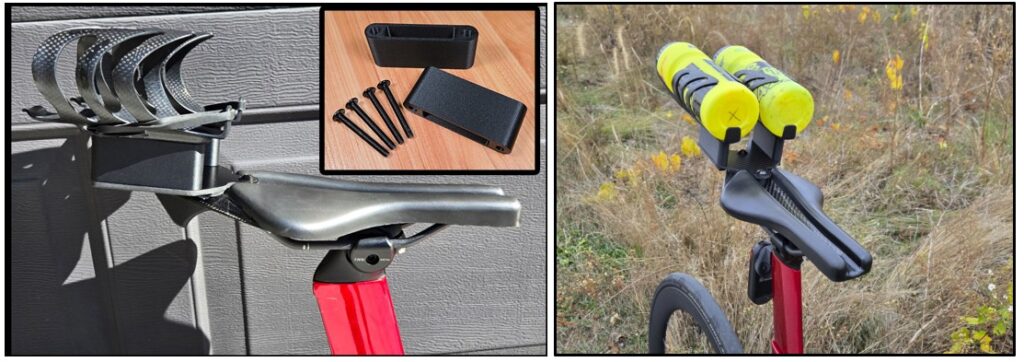
Note: If you find that the bottles are sitting too far back when riding, I can offer custom “offset spacers” to close the gap behind you. Just contact me.
Bottle Retention
For extra safety and avoid bottle launches, it is always a good idea to use elastic bands in some way.
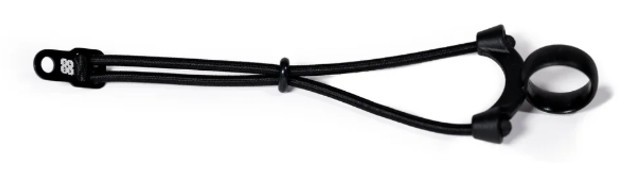
The kit provided is compatible with Wove’s bottle retention loops (available for purchase on Wove’s website).
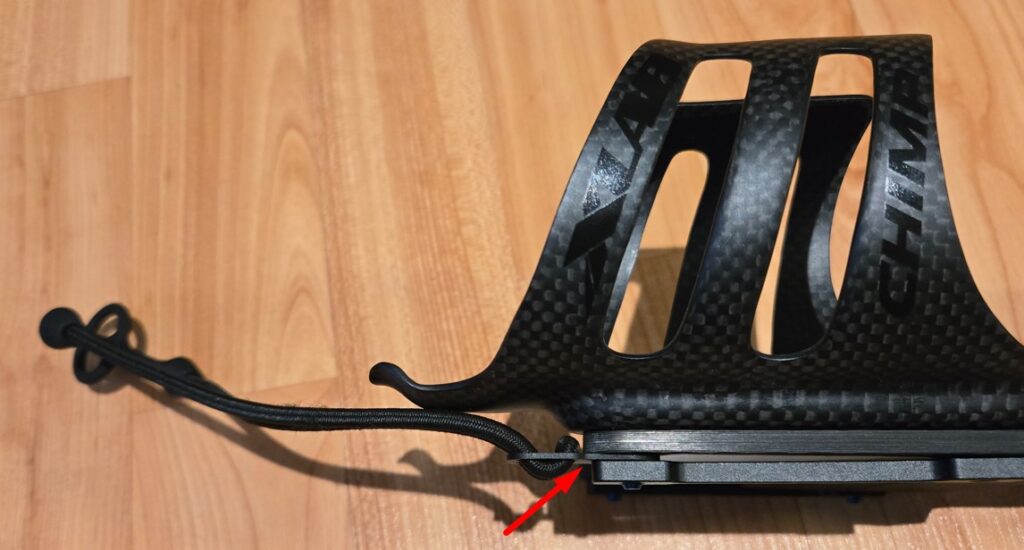
Secure the loop by inserting the loop’s mounting tab at the rear between the CF plate and the dog bone (or right below the cage if using the risers).
Appendix 1 – TPU shim for WOVE METAL rails saddles
The METAL rails versions of the Wove saddles has raised edges on the underside of the tail where the rail attaches and perhaps at the very back;
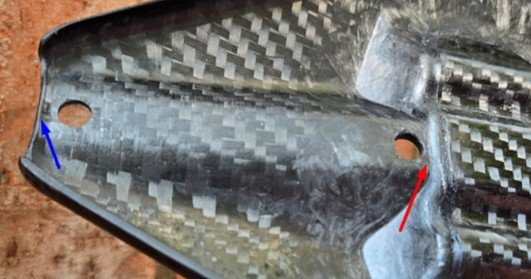
This can prevent the hook from sitting flush.
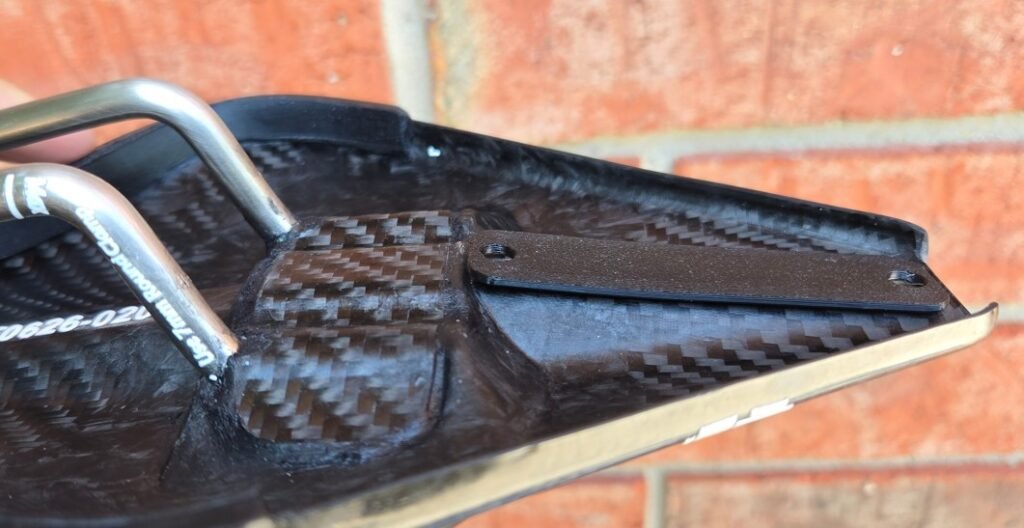
To solve that, a TPU (rubber) shim is provided. You simply install it between the underside of the tail and the hook. A strip of 3M double sided tape is included to facilitate installation keeping things lined up. In below picture, it is stuck to the saddle, but perhaps better to stick it to the hook itself (so you do not lose the shim if removing the BTS for travel or else).
Appendix 2 – Channel Spacer Thickness Selection
Default spacer thickness:
– Wove TT V8 v1 (up to ~2025): 12 mm, curved interface (align mark with saddle axis)
– Wove TT V8 v2 (2025+), M8 : 10 mm, tapered interface
In case of variations between batches of saddles or if the plate is not sitting solidly on the sides of the saddle tail, additional spacers are provided: +1 and -1 mm from the default thicknesses. Each spacer is etched with its thickness.
Guidance on spacer selection: The correct spacer must be slightly shorter than the natural space in the channel when holding the plate in place. When tightening the front screw, you want the tab of the mounting plate to deflect down slightly so that the front of the plate rests on the “wings” of the saddle tail for side-to-side stability.
The spacer simply provides a resting face to avoid too much deflection of the tab and also helps getting a more rigid assembly overall.
Contact Information
For support, questions and feedback:
>>CONTACT FORM
ENJOY!